 ultimate-guide
Termite Barrier Installation for New Construction
Last Updated: October 31, 2026
Quick Summary
Termite barrier installation for new construction places a physical or chemical barrier beneath and around the slab before concrete is poured, so subterranean termites cannot reach the structure from the soil. It is a construction stage, not a product added later, and must comply with AS 3660.1.
- AS 3660.1 requires a durable notice recording the system type, installer and installation date.
- Plumbing and electrical rough-in must be complete before the barrier goes down, not after.
- The installer should be on site during the pour to check the barrier is not damaged.
- Physical barriers use stainless-steel mesh or graded aggregate and need no chemical recharge.
- Ask for photographic evidence of the barrier at each stage, especially before the pour.
Table of Contents
- Why Termite Protection Starts Before the First Pour
- How AS 3660.1 Termite Management Shapes Your Build
- Physical vs Chemical Termite Barriers: Which Suits Your Site
- The Installation Sequence, Stage by Stage
- Termite Inspection Requirements After the Barrier Goes In
- Quality Assurance: Verifying the Barrier Was Installed Correctly
- What Drives the Cost of a Pre-Construction Barrier
- Common Installation Mistakes and Barrier Failures
- Choosing the Right Termite Barrier System for Your Project
- Book Your Pre-Construction Barrier Consultation
- Frequently Asked Questions
Why Termite Protection Starts Before the First Pour
Termite barrier installation for new construction is the practice of placing a physical or chemical barrier beneath and around a building's slab before the concrete is poured, so that subterranean termites cannot reach the structure from the soil. It is one of the most important decisions a builder or owner will make on the site.
Here is the part most guides get wrong: the barrier is not a product you add later. It is a construction stage. Once the slab cures and the walls go up, the soil beneath the building is sealed off permanently. Every treatment that should have happened there becomes either impossible or dramatically more expensive.
That is why the timing matters more than the brand on the drum.
In the tropics, the pressure is relentless. Subterranean termites remain active year-round, and a home built without a complete, correctly installed barrier is a long-term gamble. A properly specified system, installed to the relevant Australian Standard and documented at handover, gives the building a defensible line of protection from day one.
Below, we walk through the standards, the system choices, the stage-by-stage sequence, and the mistakes that quietly undo good work.
How AS 3660.1 Termite Management Shapes Your Build
AS 3660.1 is the Australian Standard that sets out how a termite management system must be designed, installed and documented for a new building. It is the framework a licensed installer works to and the benchmark a certifier will check against.
The standard does three practical things for your project:
- It defines what counts as a compliant termite management system, including barrier coverage, penetration sealing and slab detailing.
- It requires a durable notice to be fixed to the building, recording the system type, the installer, and the date of installation.
- It makes clear that the system is one part of an ongoing management plan, not a set-and-forget item.
That durable notice matters more than most owners realise. It is the paper trail that tells a future buyer, inspector or certifier exactly what was installed and when. Without it, a perfectly good barrier becomes an unverifiable claim.
Before work starts, confirm three things with your builder and installer: the system specified in the approved plans, the licence held by the installer, and how the installation will be documented for council approval and handover. Get those in writing early. Sorting them out mid-pour is where projects lose time.
Physical vs Chemical Termite Barriers: Which Suits Your Site
Neither system is universally better. The right choice depends on your soil, your slab design, your budget and how much ongoing maintenance you're prepared to manage. Here is the honest comparison. For a deeper look at the options, see our guide to termite treatment options.
| System | How it works | Suitability | Limitations |
|---|---|---|---|
| Chemical soil barrier | Termiticide applied to soil beneath and around the slab | Broad site suitability, lower upfront cost | Requires reapplication over time; some products degrade faster in wet soils |
| Reticulation system | Piped network in the soil allowing recharging of termiticide | Good for sites where future access is difficult | Needs periodic recharging; relies on the pipe network staying intact |
| Physical barrier | Stainless-steel mesh or graded aggregate beneath slab and at penetrations | Long service life, no chemical recharge | Higher upfront cost; must be continuous to work |
| Combined system | Physical barrier plus chemical treatment at critical junctions | High-risk sites and complex builds | Highest cost; requires careful staged installation |
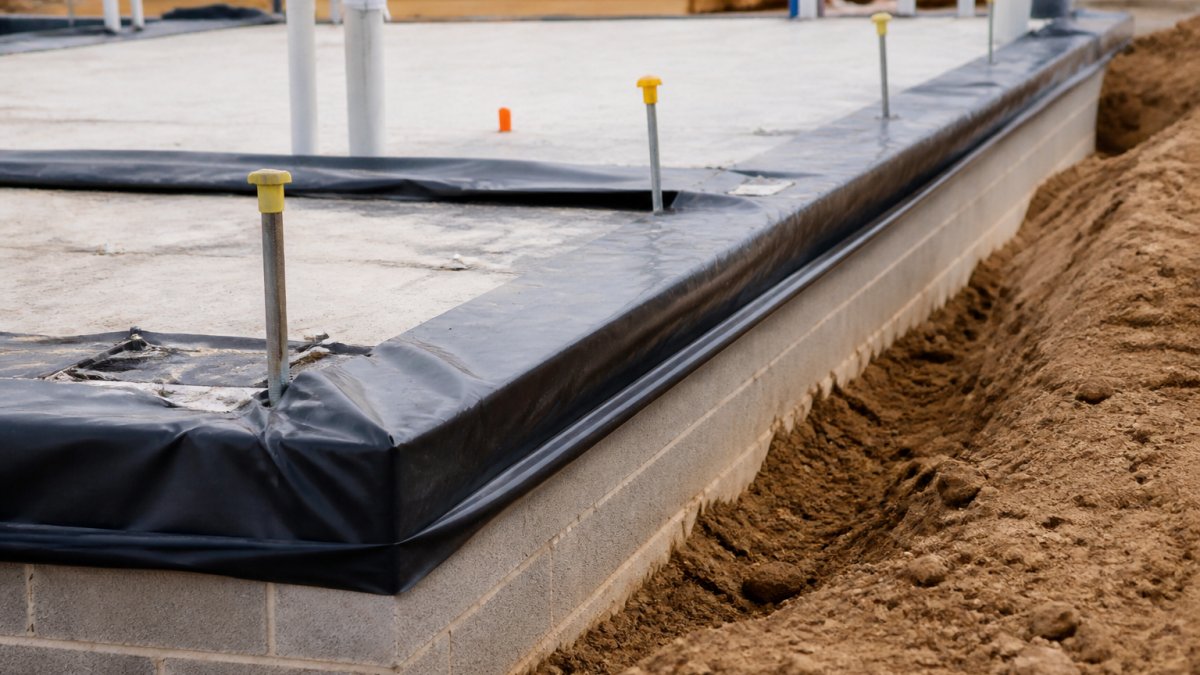
Physical barriers are increasingly built directly into the foundation of new homes, using stainless-steel mesh and specialised sealants at entry points. They suit owners who want to minimise future chemical maintenance.
Chemical barriers cost less upfront but ask for a commitment to recharging and inspection. On a wet tropical site, that commitment is not optional.
Best for: sites where future access beneath the slab will be limited, choose a physical or combined system. Skip if: budget is the only deciding factor and you are prepared to fund ongoing recharging, then a chemical barrier may be the pragmatic starting point.
The Installation Sequence, Stage by Stage
The barrier is installed across several stages, and each one depends on the last. Miss a stage and the coverage has a hole in it. What follows is the sequence as it actually runs on site, with the hold points where work should stop until the barrier is verified.
Stage 1, Before the Slab: Site Preparation and Underslab
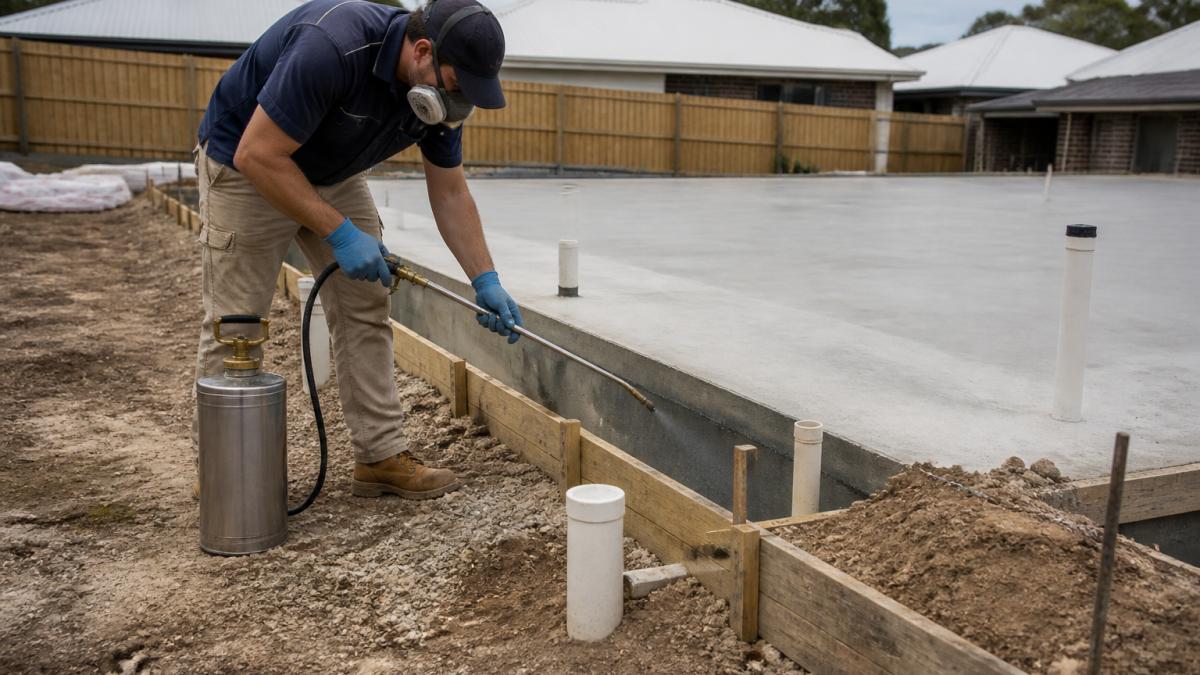
This is where the barrier's foundation is laid. The site is cleared, the soil is prepared and compacted, and the underslab application is completed before any concrete arrives.
For a chemical system, the termiticide is applied to the prepared soil at the specified rate, and the reticulation pipework, if specified, is laid out and capped. For a physical system, the mesh or aggregate layer is positioned across the full footprint and lapped correctly at edges and internal joints.
Hold point: plumbing and electrical rough-in must be complete before the barrier goes down, not after. If a trade trenches through a treated zone to run a pipe, the barrier is compromised and the affected area must be re-treated before the pour. Coordinate the programme so the barrier is the last trade in before concrete.
Stage 2, Slab Perimeter, Penetrations and Construction Joints
The perimeter of the slab is where termites most often find a way in. The barrier must run continuously around the slab edge, and every service penetration, every plumbing entry point and every construction joint must be sealed and treated.
This is the stage most likely to be rushed. Pipes, conduits and formwork create gaps, and each gap is a potential termite entry point. Physical barriers must be continuous around each penetration, with the mesh or collar correctly fitted and sealed. Chemical systems need the soil around each penetration treated and the joint sealed against moisture movement.
Hold point: the installer should inspect and sign off the perimeter and every penetration before the pour. This is the last chance to catch a gap while it is still visible.
Stage 3, During the Pour
The installer should be on site during concrete placement to check that the barrier is not damaged as concrete is placed and vibrated. Formwork removal and screeding can also disturb perimeter detailing. Any damage found during the pour must be recorded and repaired before handover.
Stage 4, After Handover: Extensions and Renovations
The barrier does not cover work done later. Any extension, new patio or renovation that breaks the slab or adds a new footing creates a fresh entry point that must be treated and tied back into the existing system. Keep the durable notice accessible and tell any future builder where the barrier runs.
Termite Inspection Requirements After the Barrier Goes In
A termite barrier is a management system, not a permanent shield. It reduces risk and buys time, but it does not eliminate termites. Inspections remain essential for the life of the building.
The frequency depends on the system and the site. High-risk tropical settings typically call for more frequent checks than the minimum, and the durable notice will state what the installed system requires. Skipping inspections is how a barrier that was installed perfectly still fails to protect a home.
Regular termite inspections remain essential for the life of the building, and you can book termite inspections and treatments directly with our team.
Quality Assurance: Verifying the Barrier Was Installed Correctly
You cannot see most of a termite barrier once the slab is poured. That makes verification a before-and-during job, not an after-the-fact one.
Ask your installer for:
- A written record of the system installed, product used, and application rate
- Photographic evidence of the barrier at each stage, especially before the pour
- The completed durable notice, fixed to the building
- A compliance certificate suitable for council approval
- Clear handover instructions on inspection intervals and any recharging schedule
A common mistake is accepting a verbal assurance that "it's all done." Get the documentation. It protects you at handover, at sale, and if a claim ever needs to be made.
What Drives the Cost of a Pre-Construction Barrier
Most guides on this topic either dodge pricing entirely or quote a single square-metre rate that bears no resemblance to what a real project costs. The honest answer is that a pre-construction barrier is priced like a trade package, not a product on a shelf. Understanding the variables lets you sanity-check a quote and budget realistically before you commit.
The main cost drivers are:
1. System type. Chemical, reticulation, physical and combined systems differ in upfront material and labour cost. Physical systems typically need no chemical recharging, which affects the long-term picture.
2. Slab size and footprint complexity. A simple rectangular slab on a clean, level site is the cheapest geometry to protect. Stepped footings, multiple wet areas, attached garages, alfresco slabs and irregular perimeters all add linear metres of barrier and additional detailing at every change of level. Complexity, not just area, is what moves the number.
3. Number of service penetrations and construction joints. Every pipe, conduit, dowel and cold joint is a point that must be sealed and treated individually. A build with a dense services rough-in, multiple bathrooms, a kitchen island, a laundry, external taps and air-conditioning condensate lines, will carry more penetration detailing than a simple shell. This is often the single biggest swing factor between two quotes for similarly sized homes.
4. Site conditions and access. Sloping sites, high water tables, rocky ground and restricted access for equipment all add preparation time. Wet soils can also affect product choice and application rates, which flows through to cost.
5. Soil type and termite pressure. High-risk soils and known termite activity may call for a more robust system or a combined approach, which is a specification decision as much as a cost one.
6. Documentation and compliance scope. A quote that includes photographic records, the durable notice, a compliance certificate suitable for council approval and a handover pack is doing more work than one that does not. That difference is real and worth paying for.
Pricing depends on the project, so we quote each one individually. Send your plans and slab design through our commercial termite barrier installations page to request a quote. For current service prices, visit the Tropic Shield Pest Services website or contact our team.
A practical way to compare quotes is to ask each installer to break their price into four lines: materials, labour, penetration and joint detailing, and documentation. Quotes that cannot be broken down that way are hard to compare fairly, and the breakdown itself tells you whether the scope is complete.
Common Installation Mistakes and Barrier Failures
Most barrier failures trace back to a handful of avoidable errors. Here are the ones we see most often.
- Disturbed soil after treatment. Trades digging or trenching through a treated zone before the pour.
- Unsealed penetrations. Pipes and conduits left with gaps around them.
- Broken mesh continuity. Physical barriers that are not overlapped or joined correctly.
- No installer on site during the pour. Damage from concrete placement goes unnoticed.
- Missing durable notice. The system exists but cannot be verified.
- No follow-up inspections. The barrier is left to manage itself, which it cannot do.
The real difference between a barrier that lasts and one that fails usually comes down to supervision and documentation, not the product.
Choosing the Right Termite Barrier System for Your Project
Start with the site, not the catalogue. Soil type, drainage, slab design, climate and the building's intended lifespan should all shape the decision. On a high-risk tropical site, a combined physical and chemical system often gives the most defensible protection, even at higher upfront cost.
Then match the system to the maintenance you're prepared to commit to. A physical barrier asks little of you after installation. A chemical system asks for scheduled recharging and inspections. Be honest about which you'll actually keep up with.
Finally, choose your installer on licence, documentation and local knowledge. A system is only as good as the installation behind it, and in this climate, local experience with tropical termite pressure counts for a great deal.
Book Your Pre-Construction Barrier Consultation
Getting the barrier right starts with a conversation before the first pour. Bring your plans, your slab design and your site details, and we will work through the system options with you.
At Tropic Shield Pest Services, our licensed technicians install pre-construction barriers for builders and developers across the region, using safe, eco-friendly methods suited to the tropical climate. We document every stage, provide the compliance paperwork you need for council approval, and stand behind the work with guaranteed protection.
To get a quote for your build, request a commercial barrier quote, or simply call or email our team to arrange a consultation.
Frequently Asked Questions
Is a termite barrier mandatory for new homes?
It depends on where you build. The National Construction Code and AS 3660.1 set out how termite risk must be managed, and many councils and private certifiers make a compliant termite management system a condition of approval for new builds in high-risk areas. In tropical regions where subterranean termites are active year-round, skipping a barrier is rarely a sensible choice. Confirm the specific requirement with your certifier before your slab is poured, because retrofitting protection later is far more disruptive and costly.
What are the different types of termite barriers for new construction?
New builds typically use one of three approaches: a liquid chemical barrier applied to the soil and slab edges, a physical barrier such as stainless-steel mesh or a graded particle system, or a reticulation system that delivers termiticide through pipes installed around the perimeter. Many projects combine methods, for example mesh at penetrations plus a chemical perimeter treatment. The right mix depends on your soil, site drainage, slab design and how accessible the perimeter will be once landscaping is finished.
How long do termite barriers last in new homes?
Lifespan varies by system. Physical barriers such as stainless-steel mesh are designed to last the life of the building, while chemical barriers are typically rated for a set number of years before retreatment is needed, and reticulation systems allow the chemical to be replenished without digging. No barrier lasts forever without attention, which is why AS 3660.1 pairs every system with ongoing inspections. Check the manufacturer's stated service life and the durable notice left at handover so you know when action is due.
Does the Building Code of Australia require termite protection?
The National Construction Code, which contains the Building Code of Australia, requires that buildings be protected from termite attack where a termite risk exists. It points to AS 3660.1 for how a termite management system should be designed, installed and documented. Your builder or certifier applies this to your site based on the local termite risk. Ask for the termite management plan and durable notice as part of your handover documents so the requirement is demonstrably met.
Can I install a termite barrier myself during construction?
No. Termite barrier installation for new construction must be carried out by a licensed installer, and the work needs to be documented for council approval and warranty purposes. Chemical application requires a licensed pest technician, and physical systems must be fitted to manufacturer and AS 3660.1 specifications to remain valid. A DIY attempt can void your builder's warranty, fail certification and leave gaps at penetrations that termites find quickly. Use a licensed provider and keep the compliance paperwork.
How much does a pre-construction termite barrier cost?
Pricing depends on the size of the slab, the system chosen, site access and how many penetrations and construction joints need sealing. A physical barrier generally costs more upfront than a chemical treatment but lasts longer, while reticulation systems add installation cost but make future retreatment simpler. Ask for a written quote that itemises the system, the perimeter length covered and any exclusions. Get in touch with Tropic Shield Pest Services for a quote tailored to your project.
The window to protect a new build closes the moment the slab is poured. If your project is still at the planning or site preparation stage, get the barrier specified and booked now, while it is still a construction stage rather than a repair job. Get started with Tropic Shield Pest Services and give your build a barrier that is properly installed, fully documented and built for this climate.